Main menu
You are here
Export X3DOM
This Tutorial shows you how to export your project into X3DOM
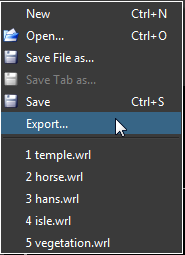
Click on File in the top left and choose Export.
The Export Dialog will open. Choose X3DOM as fileformat.
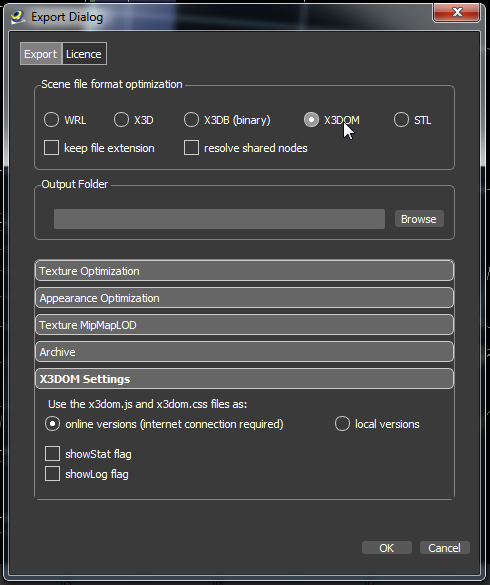
Choose your output folder by writing into the edit line or select your folder by using the Browse button.

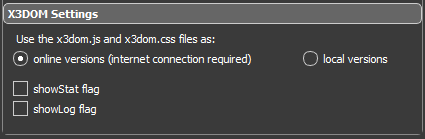
You can use the X3DOM online or local version. If you choose the online version your project is linked to the online versions of x3dom.js and x3dom.css. For the online version a internet connection is required and the X3DOM server must be run.
If you choose the local version a copy of x3dom.js and x3dom.css will be included to your project.
If you want to show the statistics window check showStat flag.
If you want to show the log window check showLog flag.
If you click the OK button the project will be exported to your choosen folder.

The outputfolder contains a xhtml filde and one folder for maps, one folder shared textures and one folder for additional resources.
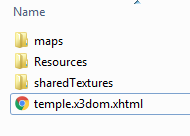
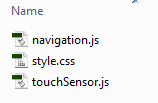
The resources folder contains one css file and two js files.
The navigation.js file overwrites the X3DOM build in navigation.
The touchSensor.js file implements TouchSensor functionality.
Note that you have to copy the outputfolder to a webserver otherwise textures won't be displayed. To test your project on your local computer you can install a http server like Apache.
For more informations about X3DOM visit the X3DOM Website.